


How to Use the Windows 10 Start Menu
What is the start menu?
It seems appropriate to start with the Start Menu. The Start Menu is the where all the programs and apps on your computer can be found easily. If you want to start using a program or app, you usually start at the Start Menu.
You can access the Start Menu by using the Windows Key on your keyboard, or clicking on the Start Button on the task bar
Once the Start Menu is open, you can just type to perform a search for programs or files on your computer. Usually only a few letters are needed to find what you’re looking for, then hit enter to open the program or file.
You can also ask questions about things like the weather or sports or movies, and get web results right in the Start Menu. Clicking on any of the links will open it in Microsoft’s Edge Browser, even if you have a different browser selected as the default. (https://www.microsoft.com/en-us/edge)
Adding / Removing Apps
To add a program or app to the Start Menu, you can type to search for it, then right click it and select “Pin to Start”.
You can also pin a program to the Start Menu by dragging it from the left list of programs and into the Start Menu. Don’t worry, it will still be in the list of programs on the left.
You can remove any pinned program or app from the Start Menu by right clicking it and selecting “Unpin from Start”.
Resizing Apps / Widgets
Not only can you resize the start menu, you can also resize some of the programs or apps that are pinned to the Start Menu. To resize an app, right click it and hover over “Resize” to see the different size options. Some widgets provide additional features in the larger views. For example, the weather app will display the temperature in the small size, but in the larger sizes you will also get a weekly overview.
Organizing the Start Menu
It is possible to organize your pinned apps into groups, you can then give the group a name. It is also possible to reorder or move a group. To create a new group, just drag an app outside of a currently existing group.
Installing and Updating Microsoft Store Apps
Use the Microsoft Store to manage and update owned apps, as well as install new apps.
To install a new app, just search the Store for the one you want. Many of the most popular apps are free. The Store Home usually has a section for the most popular free games and apps like Netflix, Spotify and Roblox.
To install a new app just click into the app you want, then click the blue “GET” button if it’s free, if not, click the blue “BUY” button.
Clicking the three dots, that are located on the top right of the Microsoft Store app, will reveal a menu. You can view all of your owned apps by selecting “My Library”. From here you can view all of your owned apps, any apps that are currently installed, or apps that are ready to be installed. You can also see if any updates are available for download.
To enable auto updates, select the “Settings” option from the three dots menu, and make sure “Update Apps Automatically” is turned on.
(https://support.microsoft.com/en-ca/help/4479732/get-apps-from-microsoft-store-on-windows-10-pc) (https://support.microsoft.com/en-ca/help/4026259/microsoft-store-get-updates-for-apps-and-games) (https://support.microsoft.com/en-ca/help/15081/windows-turn-on-automatic-app-updates)
Computer Repair Tutorials
Learn to repair it yourself with Ducktoes Tutorials!
On this page you’ll find how-to guides to help you repair, manage and maintain your own computer. They’re posts from my blog. I put them here to make them more accessible and easier to read in order. Check back often for new tutorials. Or read the newest on my blog.
If you want to prevent losing your precious photos, music, and documents. And if you want to save a lot of money and trouble over the years to come–your computer repair costs due to virus and malware problems–then follow the instructions from the below link. It’s a very inexpensive (free!) preventative measure, considering how much reformatting and tech support services cost.
Use Google as a Computer Repair Tool
If you have a problem with your computer that you need help with, you can always get expert advice by searching with Google for the answer. For instance, if your computer is infected with the System Tools virus, you can search on Google for “Remove System Tools Virus” and you’ll get some advice that may let you repair your computer yourself. Or else you can call or contact us at Ducktoes and we’ll fix it for you.
Protect Your Computer from Viruses and Malware
Most computers have viruses, malware, or adware of some sort. If you go out on the web without both anti-virus and anti-malware protection or if your protection is expired or compromised, you probably have malware and viruses on your computer, you may even have hundreds of different kinds. Or thousands. Just this week, I cleaned 1095 different malware off one computer. It was infernally slow. Ai-yai-yai, our eyes glazed over while waiting for it to boot.
Sometimes malware doesn’t effect the performance of your computer perceptibly, at least not at first, but often it slows it way, way down. And it always makes your data and personal information insecure.
Many people think their antivirus software is enough, that it protects against all malware. This is a dangerous misconception because Malwarebytes is made to run alongsite anti-virus software.. It finds many malware, trojan horses, and adware that antivirus software misses, such as the encryption or ransomware viruses.. So it’s imperative that you have both anti-virus and some dedicated anti-malware protection.
This is what you should do to protect yourself:
First download Malwarebytes from Malwarebytes.org. Update and run it. Here’s a how-to.
After you’ve cleaned up the malware, then install a virus software. AVG Personal is a free version. It’s excellent. You can upgrade both by buying the software. I recommend Malwarebytes Pro and use it on my own computers. I also use AVG Cloudcare.
Make sure your Window’s Updates is set for Automatic or that you download and install them regularly.
If you want more protection from hackers than the Windows Firewall provides, I recommend Zone Alarm’s firewall, which also has a free version, although it can block Internet access if you don’t manage the exceptions well, and may be frustrating, depending on your computer expertise.
Speed Up Your Computer
Part One: Clean-up the Hard Drive.
The first thing you do to speed up your computer is to get rid of malware, spyware and viruses. What if you’ve already done the above and your computer doesn’t have malware or viruses, but it is still way too slow? Or what if you’ve just removed the viruses but your computer still has only sped up a little. Then this section’s for you.
The first thing I do to speed up a computer is clean up the hard drive. If your hard drive has no room to run or swap files, this can significantly slow down your operating system. Running Disk Cleanup on a regular maintenance basis can really enhance system performance (that includes speed!).
To start, click the Start button, then All Programs, then Accessories. Among the categories listed on the Accessories, is System Tools. And within System Tools, you’ll find the one you want, Disk Cleanup.
You will be presented with a drop-down menu. Select the disk you want to clean. If you have two hard drives or your hard drive is partitioned into two or more virtual drives, you’ll want to clean up all of them.
After you select the drive, click the OK button. Disk Cleanup will analyze the drive and see how much room can be freed. Now be prepared to twiddle your thumbs, since this can be a loooooong process depending how much stuff you have on your hard drive. And you know the old adage about a watched pot that never boils, a watched computer process never “boils” either, so go grab a cup of coffee or have quality time with your significant other (the one you’ve been neglecting while going online with your super slow computer).
After the drive is analyzed, you will be presented with a list of items to be selected for cleanup. Select them.
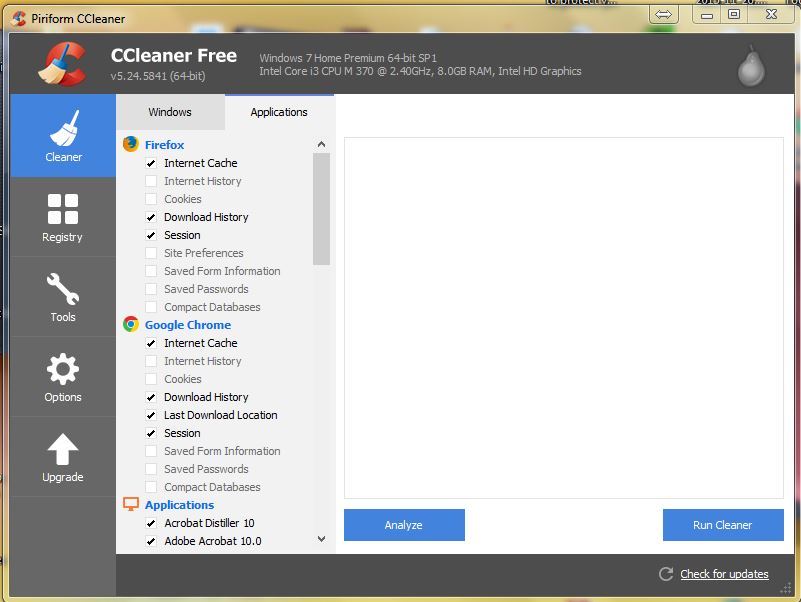
Another great tool for clean up is CC Cleaner. It is a really quick and easy way to clean up old temp files and junk from your computer. Download it from their site and run it. I always uncheck the history and cookies (the cookies may contain login information that you’ll miss) from the browsers, that is from Internet Explorer, Firefox, and Chrome etc. and get rid of the rest. Look at the other tabs to find Chrome and Firefox.
Part Two: Defragment the Hard Drive
After you run Disk Cleanup (see Part One), you’ll want to defragment the hard drive. Hard drives have arms that retrieve data much like those on old phonograph players. (Some of us actually remember those!) Except instead of staying in one place as a phonograph arm and needle does as the record goes around underneath it, hard drive arms move back and forth across their round platters. When data is too scattered, the hard drive arm has to move excessively to retrieve it, therefore wearing out the hard drive prematurely. (I learned this from my friend Ken Wicker who was a computer teacher at Swainston Middle School in North Las Vegas when I was an ECS there. Ken is amazing a hardware expert!) So fragmention also slows down the computer.
Defragging puts files together saving time and wear and tear on your hard drive. Contiguous files are much easier and faster to retrieve and process.
To defrag in Windows versions previous to Windows Vista, from the Start button, go to All Programs, then to Accessories. Under Accessories you’ll find System Tools. Inside System Tools, you’ll want Disk Defragmenter. (By the way, if you are running an older operating system you should upgrade unless you are running it for a very specific and good reason.)
The Disk Defragmenter window will open. You’ll be presented with a list of volumes. Select one to start with, that is, if there is more than one listed. (C:) is usually the main drive, but there also may be (D:) and (E:). Then click the button “Defragment”. Defragging a drive can take a long time, so outside and go for a walk or play with your kids or dog.
For Vista, Windows 7, 8, and 10 versions of Windows, defragmentation is set to run automatically, every Wednesday, at 1 a.m., unless your computer is powered off. You can modify the settings by going to the Start button, All Programs, Accessories, and System Tools.
Part Three: Turn on Automatic Updates
Windows works best and is most secure when Automatic Updates are turned on, so the most recent updates from Microsoft are installed regularly.
To turn on the updates, open your Internet Explorer and then go to Tools on the menu bar at the top, next to Favorites. On the Tools drop-down menu you’ll find Windows Update. (If, as is sometimes the case with Internet Explorer 7 , the menu bar is not visible, go to the Tools (with the small picture of a grey gear by it) on the far right of the browser, just above the open browser window. Click on Tools. On the drop-down menu, click the words “Menu Bar” so a check mark appears next to the words. Now your menu bar should be visible back at the top left.)
When you click the Tools on the menu bar, a drop-down menu appears. Click on the words “Windows Update”. The Microsoft Windows Update webpage will open. If your Windows Updates are turned off, you’ll see a red shield and the warning “Help protect you PC.” Underneath you’ll find a button that says “Turn on Automatic Updates”. Click it. A new smaller window will open. Select the time when you want your computer to download the updates. Mine is set for “Everyday” at 12 p.m. Click “Okay”.
If you’d like to install the Updates right away, go back to the Windows Update website and click, “Express Updates.” Follow the instructions that Microsoft gives you.
If you have any questions please e-mail me.
Part Four: Uninstall your Torrents or P2Ps.
I know that among some people, this suggestion will be a very unpopular, but if your computer is too slow you really ought to remove your free file sharing music and video P2Ps, such as Utorrent, etc. If just reading this advice makes you howl and scream on the floor, you might, after you pull yourself together, reconsider. All that free music is filling up your hard drive and making your computer more cluttered than it needs to be, plus it allows other people access to your computer taking up bandwidth when you “seed”. This traffic uses up resources and slows your computer down. It will also degrade your network performance, making going on-line a lengthy process. You can always buy music from iTunes at low cost, which is much cheaper than all the computer maintenance, troubleshooting, and computer hardware will likely cost you in time and money. Also using legitimate music sources will force you to be more selective and download only songs you really like. How many songs can one person listen to in a lifetime anyway? Paying for downloads gives royalties to your favorite musicians, which might inspire them to record more albums. Some diehard P2P lovers tell me that the artists only get a small percentage of the money–the corporate record labels get most of it. True. Yet who is going produce albums and promote groups if it is not profitable enough for corporations? Also almost all peer-to-peers have adware and spyware attached to the software downloads. If you think corporations are bad, cyber-criminals are worse. They steal from ordinary people without doing anything positive in return. To uninstall your P2Ps or any programs, go to Start, then Control Panel, then Add or Remove Programs. Wait for the list to form. Select the name of the P2P you want to uninstall and click remove. After you delete your file sharing program, you’ll need to run your anti-spyware to get rid of the spyware and adware. Spyware and adware do not show up in the Add and Remove Programs tool of the Control Panel, since the creators and promoters of such applications, don’t want you to be able to remove them. So get rid of the illegal file sharing P2Ps and use iTunes or other legal music downloader instead.Part Five: Clean-up the Registry.
Why should you clean the registry? The registry is a listing of all the settings and options in Windows. They are listed in the form of keys. When the registry gets cluttered with unfunctional and useless keys the computer still has to refer to and process them and this slows booting, running applications and going on-line. To fix this and speed things up, you can delete or edit the keys manually, which is tedious and risky, since changing the registry is a good way of messing up the computer completely, if you don’t know what you’re doing.
The best registry tool is jv16 PowerTools by Macecraft. The trial of 30 days is not limited but gives you access to the full version. In some computers, it is the tool that makes the most significant difference in speed. Use both the Registry Cleaner and the Registry Compacter components.
Part Six: Run Checkdisk.
Another way to speed up your computer is to run checkdisk. The process is easy and fun to do (what I think is fun may seem strange to you). But at least this tunes up your computer and should be part of your regular computer maintenance.
Go to the Start button, then to Run. In the text box that appears, type “cmd” (but without the quotation marks. This will bring up the dos prompt. Type this in: chkdsk c: /f /r /x You have to type this in exactly. Hit enter. It will ask if you want to run this next time you start your computer. Type Y for yes. Restart your computer. Now go do something non-computer related. The process can take 30 minutes to a couple of hours.
Part Seven: Max out your Ram
Getting enough ram will mean your computer will not have to use the hard drive as often as a page file. The hard drive can be a bottleneck for speed, since it has mechanical parts like rotating platters which can be slow compared to electronic processes. When you have too many applications open for the ram to handle, the computer “pages” some of the open applications on the hard drive, until that application’s window is active again. For instance if you have Chrome, Word, and Photoshop open and don’t have enough memory for all of them, the excess will be held on the hard drive. When you switch from the Chrome to Word, for example, then the computer will switch the Word to the ram and put the Chrome in the page file. This transition is a slow process since it is accessing the hard drive. With enough ram, less page file is used and less transitioning to and from the hard drive is necessary.
Find out if your computer can handle more ram. It is usually an in-expensive upgrade.
Part Eight: Turn off Indexing
The Indexing Service runs constantly, memorizing and making a list of where your files are, so when you search for something, you can find it quickly. The service makes searches faster, but it slows down the rest of your computer. If you have a really fast computer you won’t mind or notice this, however if you have a SLOW computer, you’ll probably want a faster computer over a faster search. To turn off Indexing do this: Go to the Start button then find “My Computer”. Double click “My Computer”. Find your hard drive(s), usually C, or C and D if you have more than one. Right click on the hard drive. Select “Properties”. Near the bottom find “Allow indexing service to index this disk for for faster searches”. Uncheck the box. Click Ok. When a new window opens select “Apply to all folders and subfolders”.Call us at (403) 219-3031 for more information.